
iPhone Installation Guide:
Prerequisites:
Check if your IPhone model supports an eSIM. See full list of supported devices.
Update to the latest IOS if you have not already.
Check if your device is unlocked by your carrier.
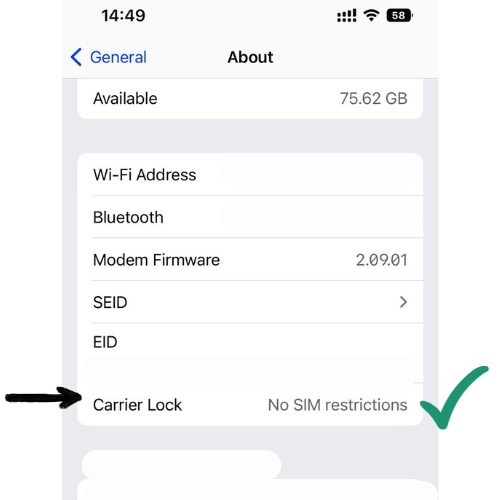
On iphone go to -> Settings / General / About under Carrier Lock should show "No SIM restrictions" otherwise contact your carrier to unlock your device.
Active & uninterrupted internet connection required.
🚀 Pro Traveler Tip: Configure your eSIM before your trip (if your own country is available) & avoid searching for public wifi connections while setup.
First go to xpresim.com & choose the eSIM mobile data plan that best suit your needs and buy it, you will receive an email with the eSIM activation codes. Buy an eSIM plan.
1. Open the email sent by hello@xpresim.com after your purchase from other device & look for the QR CODE.
2. Open your phone´s camera app.
3. Scan the QR CODE
4. Tap in the yellow "Cellular Plan" button that prompts on screen.
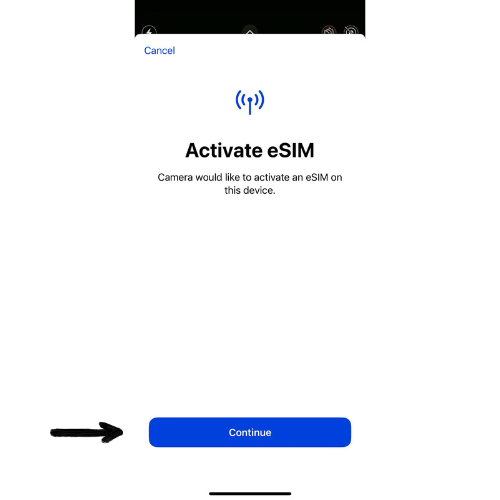
5. When screen prompts "Camera would like to activate an eSIM on this device." Tap Continue.
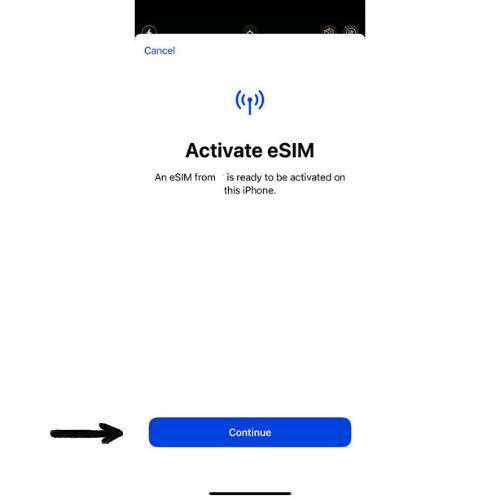
6. When screen prompts "An eSIM of [carrier name] is ready to be activated on this iPhone" Tap Continue Again.
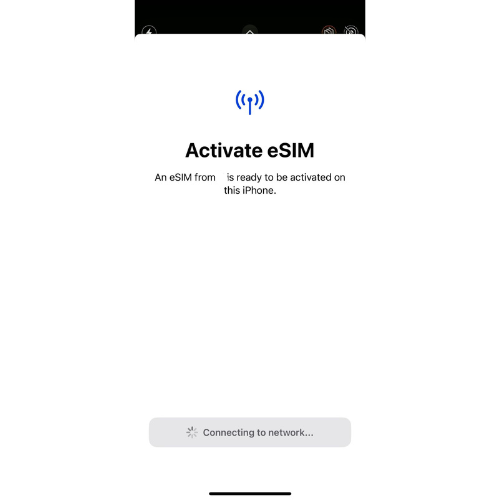
7. Wait for the connection to be established with the network.
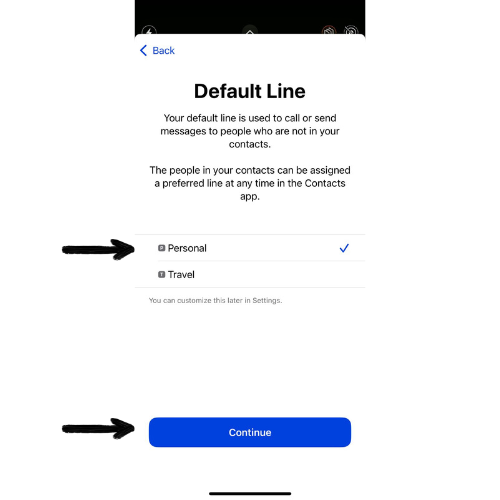
8. Choose your default line (we recommend to chose your personal line, you can change this and each line´s name in cellular settings later).
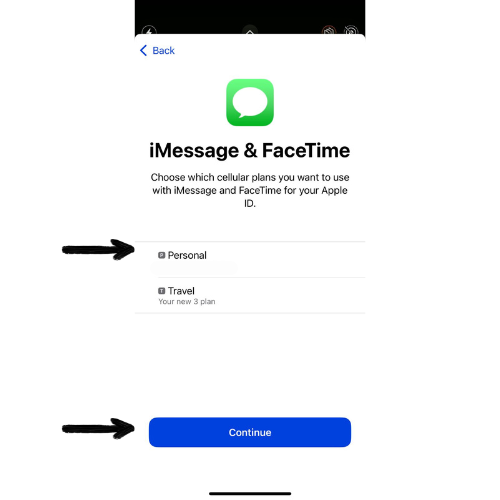
9. Choose the cellular plan which you will use with iMessage & FaceTime (we recommend to chose your personal line, you can change this in cellular settings later).
Activation Steps:
1. On your iphone go to Settings / Cellular.
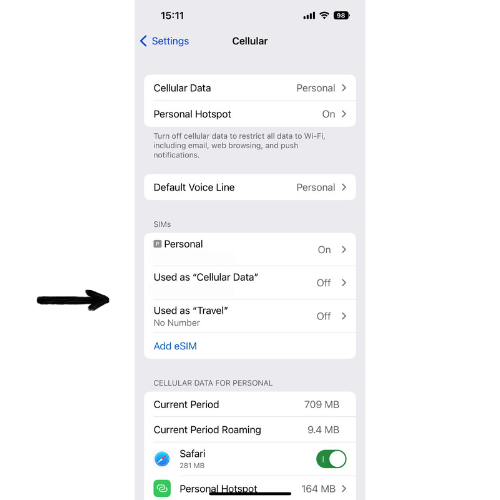
2. The new line should now show under SIMs tap on it.
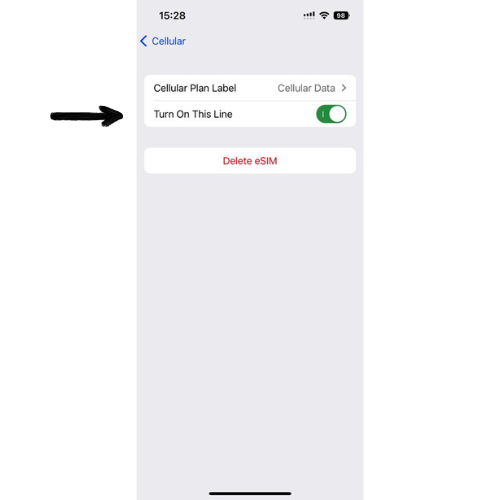
3. Turn on the line.
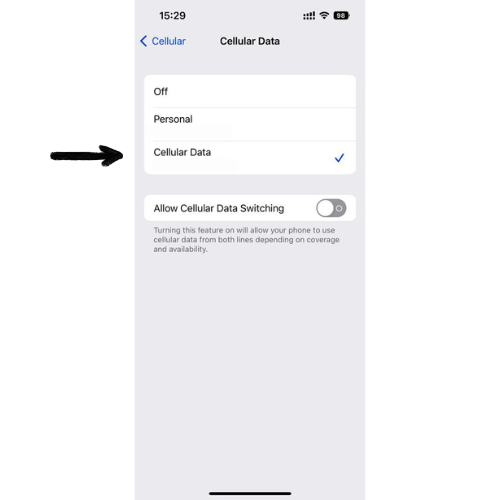
4. Go back to the main cellular settings menu, next tap on "Cellular Data".
5. Select the new data plan from the list a checkmark should appear next to it. Leave "Allow Cellular Data Switching" OFF. Go back to the main cellular settings menu.
6. Tap again on the new eSIM data plan under SIMs and activate "Data Roaming".
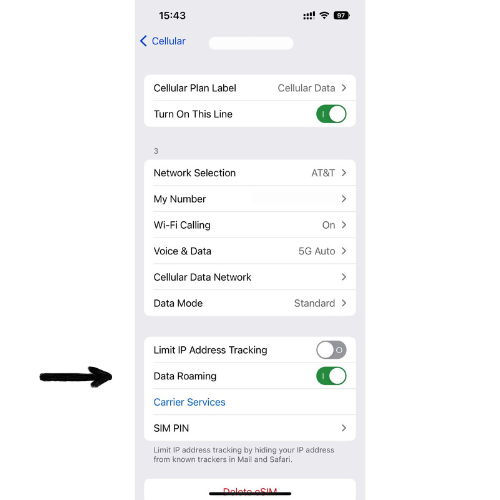
7. Turn OFF your wifi and your Local Personal Line, Settings > Cellular > look for your local SIM line and tap on it, on the next screen leave the "Turn On This Line" option OFF.
1. Open the email sent by hello@xpresim.com after your purchase from other device & locate the manual configuration codes.
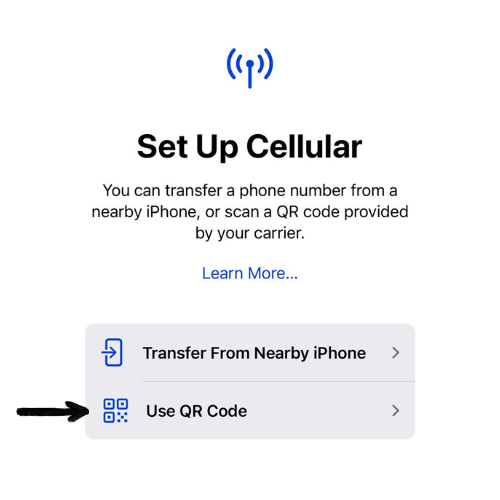
2. On your iphone go to Settings / Cellular / Add eSIM.

3. Tap on "Use QR Code".
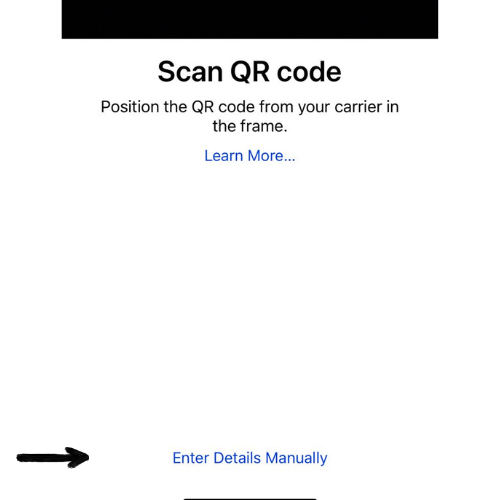
4. Tap "Enter Details Manually".
5. Enter the SM-DP+ Address code you get on your email inbox after purchase. (hint: you can copy & paste to avoid typos)
6. In the Activation Code field enter the Matching Id code from the email.
7. If you receive an optional code, enter it in the confirmation code.
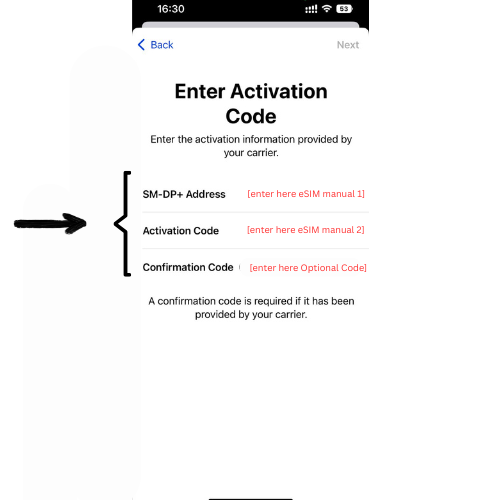
8. Tap "Next".
9. Continue with step 6 of QR Code installation.
10. Congratulations you are online!
Important Notice:

Copyright © 2024 XPRESIM Co.
All rights reserved.
Translations powered by Google Cloud Translation
2024 XPRESIM Co.